Scaffold a new Workload and create staging and prod Environments
Introduction
This tutorial explains how to quickly scaffold an Application skeleton that already comes with a development Environment. You can progress towards production by creating more Environments as needed and promoting your Application.
Although the skeleton is by no means a complete Application, it’s beyond the scope of this tutorial to develop any functionality. Instead, our purpose is to demonstrate how to get yourself on the starting line of a golden path and quickly walk it to production.
For the following step-by-step guide, we’ll assume that you’re using an Internal Developer Platform reference architecture instance as recommended in the prerequisites. If you’re using your own variant, you may find there are differences in the templates available to you and the config options. The overall process will be the same as long as the components mentioned in the prerequisites are all present.
This tutorial is written from the perspective of a developer with no specific skill level or prior experience.
Prerequisites
To get started with this tutorial, you’ll need:
- A source code repository, e.g. GitHub.
- A container image registry, e.g. Amazon ECS.
- A Kubernetes cluster, e.g. Amazon EKS.
- A Backstage developer portal installation with
- Existing scaffolding templates.
- Enabled Humanitec integration.
- A Humanitec Platform Orchestrator Organization with
- The Resource Definitions to connect the infrastructure, e.g. the Kubernetes cluster.
The easiest way to achieve a consistent and pre-integrated installation of these prerequisites is to follow our tutorial Setup the reference architecture in your cloud for the installation on the cloud provider of your choice. Make sure to enable the optional Backstage portal if you do.
Instructions
Start the scaffolding process
- Determine your Backstage URL and open it.
- In the Platform Orchestrator, select Applications from the left-hand menu.
- In the “backstage” Application, select the development environment.
- Select the Deployment linked under “Active deploy”.
- Select the backstage Workload.
- Under “Resource Dependencies”, expand the “dns” entry.
- You will find the
hostvalue containing the DNS hostname. - Enter the hostname into your browser to open your Backstage instance.
- Navigate to the catalog in your backstage portal. This will display the list of owned components.
- Select the Create button to start the scaffolding process.
- In the “Create a New Component” screen, pick one of the available templates. If you’re using the reference architecture, it’s best to use the “Podinfo Service Template”, it has the smallest footprint and can be adapted to your own setting by simply changing the Dockerfile later.
- Select Choose for that template.
- Give the Application a name that conforms to the rules and select the Next Step.
- Review your inputs and select Create.
The “Task Activity” screen will open, wait for all process steps to complete. After you have green checkmarks on all steps, you’ll have access to the result via the following links:
- The “Repository” link will take you to the GitHub repository created as part of the scaffolding (we’ll explore this in the next step).
- The “Open in catalog” link will open the newly created Backstage component.
Familiarize yourself with the repository contents
Open the Repository link and get familiar with the repository contents.
Take a closer look at the .github/workflows/deploy.yaml file. It describes the pipeline that builds the image out of the Dockerfile and then notifies the Platform Orchestrator to create a Deployment. It does this by using humctl as a last step - a command line utility that translates Score files into the format that the Platform Orchestrator understands. Find the open source Score project here if you want to read up on the specification.
The Score file that’s being translated is score.yaml. Check out the contents to understand what we are deploying. It describes the container itself and also the Kubernetes-based networking constructs to make it accessible from the outside.
Get to production
By now your development Environment should be deployed, so take a look.
- Let’s start by navigating to your Application in the Platform Orchestrator. Choose the second link Open in catalog on the “Task Activity” screen. This will open the overview of the newly created component.
- On the upper left-hand side of the content, you’ll find the “Deployments” widget that shows your Application’s state as reported by the Platform Orchestrator.
- Click the box in “ENVIRONMENTS” and then the box in “WORKLOADS”. This drill-down will open up the “RESOURCES” provisioned along with the Application.
- Click on the host field in the “externals.dns” box to open your running Application.
- This will open the UI of your Application. For the standard reference architecture case, it will be the PodInfo UI.
- Then use the “HUMANITEC APP” button to jump to the right place in the Platform Orchestrator.
In the Platform Orchestrator, you’ll directly start on your Application because the link on the portal was composed accordingly by the Humanitec Backstage widget. Remember to note how the URL also reflects your location in the Platform Orchestrator. You can use that to navigate quickly if you know where you want to go.
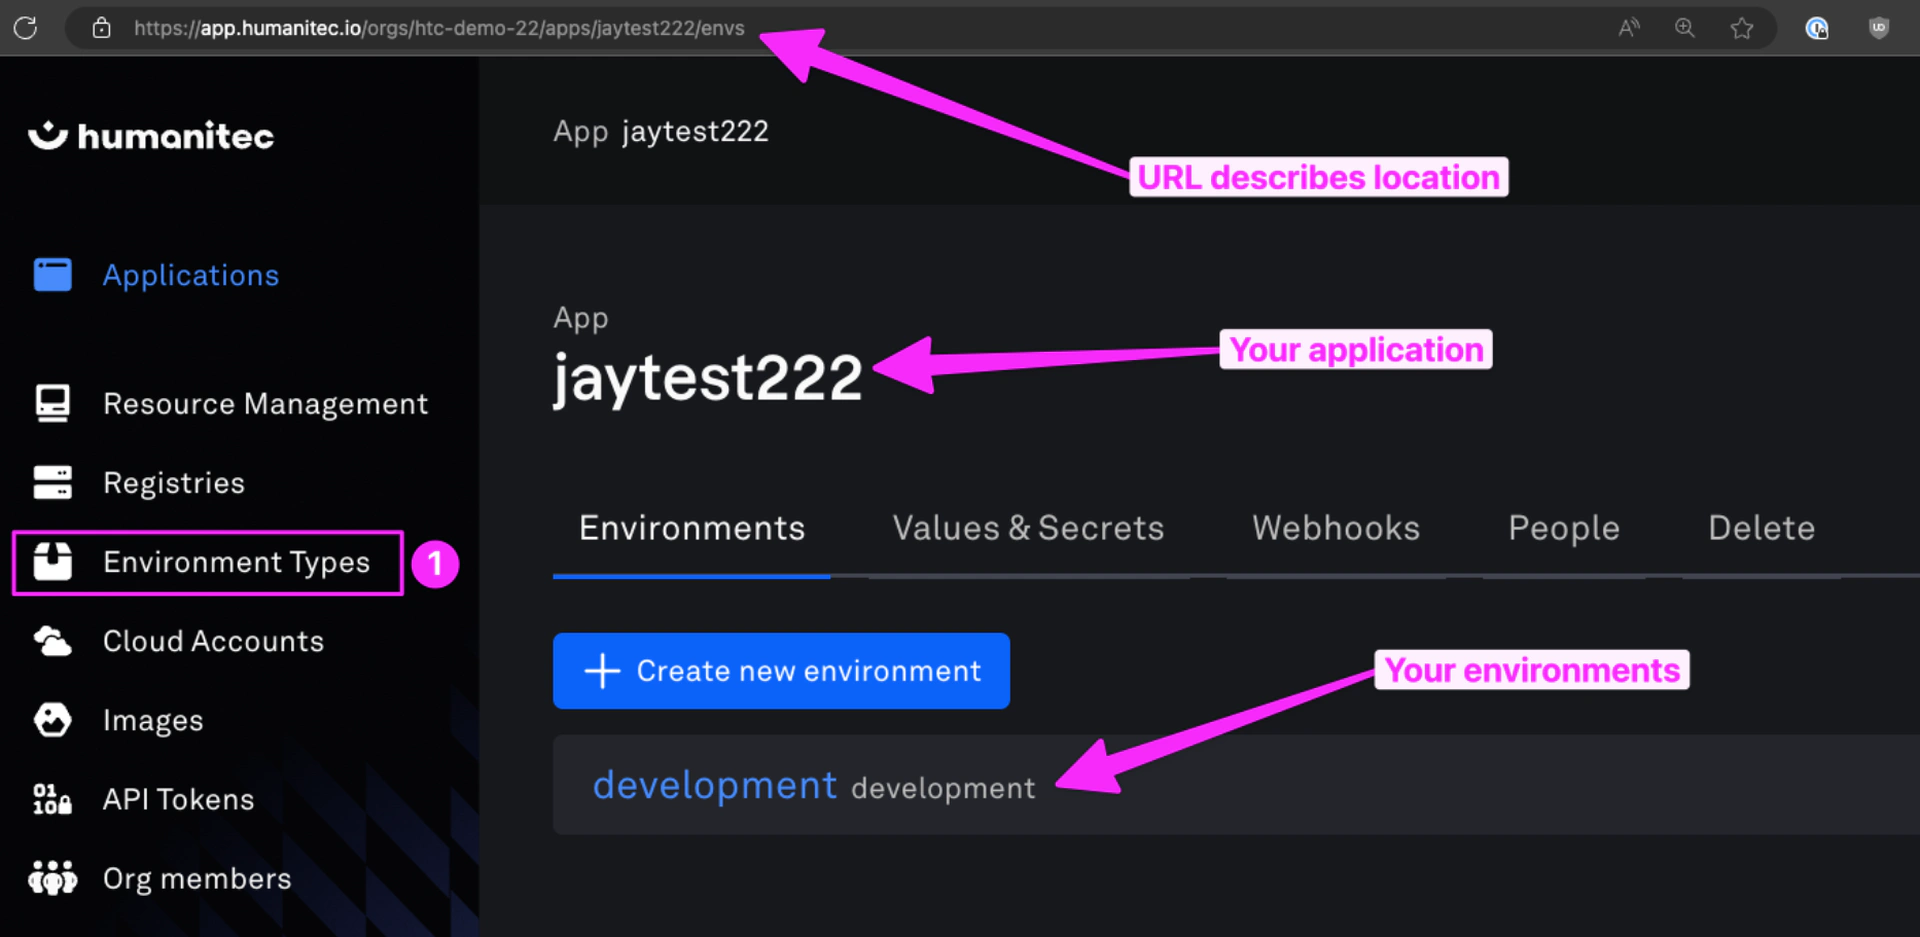

As an administrator, you’ll see all config options on the left-hand side in the navigation bar. We want to go to “Environment Types” first, because we currently only have Environments of type “development”.
We now want to add two more Environments for staging and production to get your new service out into the world.
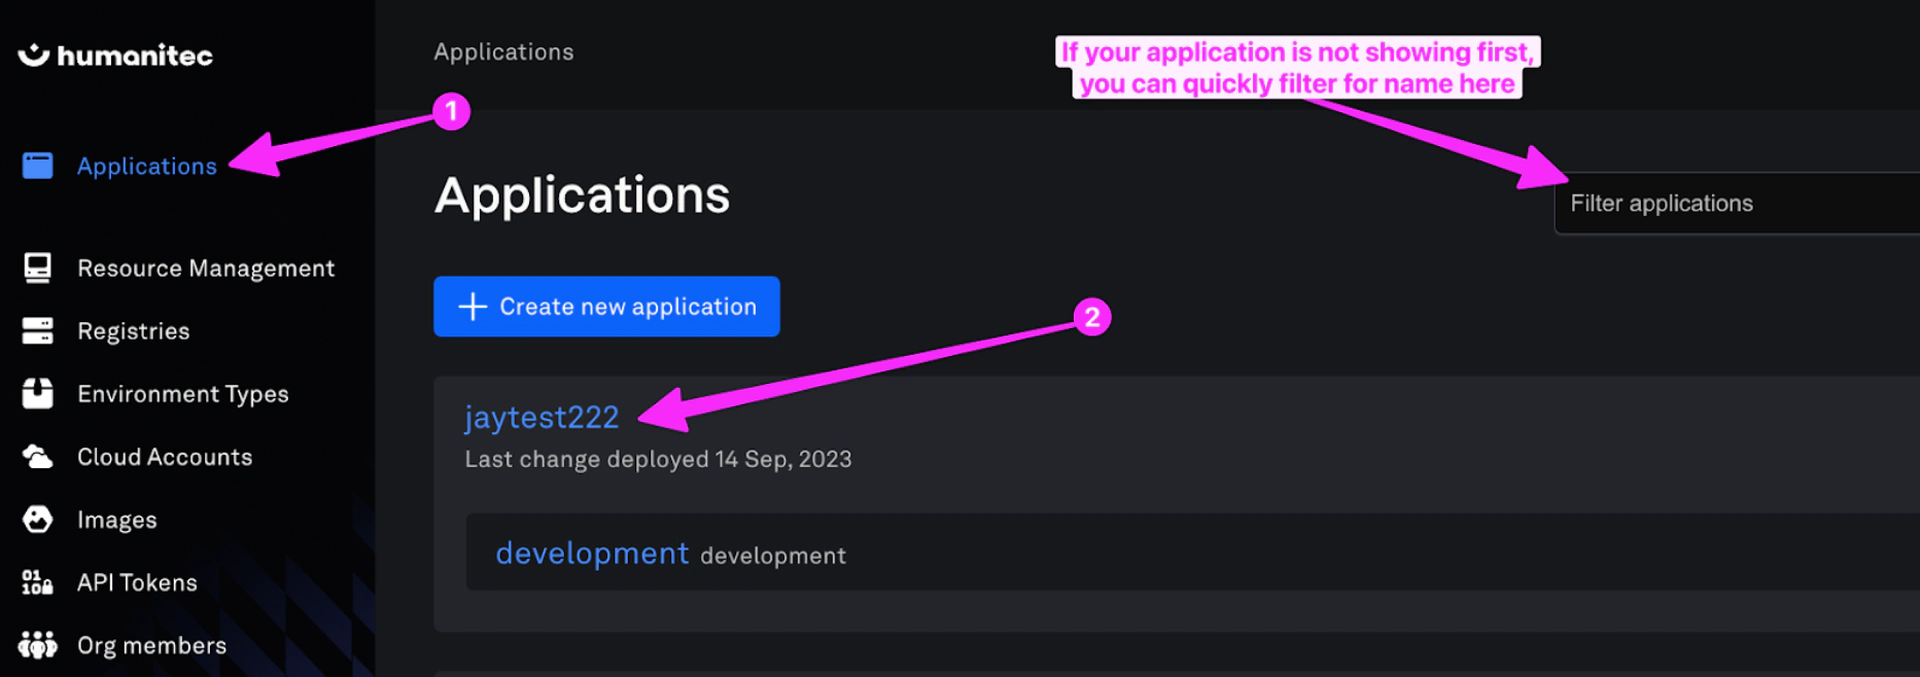
- From the left-hand navigation menu, select Applications.
- You’ll find an Application with the name you entered earlier for the new component in Backstage. It will already contain one Environment named “development” and is the same Environment we opened earlier via Backstage.
- Note that the Backstage widget is just proxying the same information you see in the Orchestrator UI.

Now that you’re in the Application you can select the + Create new Environment button and create the “staging” Environment first:
- For Clone From select “Development”.
- For Environment Type select “development”.

- For Environment ID type “staging”.
- Select Create.
Repeat these steps for Environment ID “prod”, also cloned from “Development” and with Environment Type “development” .
This gets you to three Environments, two of which have not yet been deployed. We’re going to change that now to get your Application out into the world.
Execute the following steps for the “staging” and “prod” Environments, starting with “staging”.
- From the left-hand navigation menu, select Applications.
- Choose your Application.
- Navigate to the Environment by clicking the Environment name.
- Select the Draft deltas tab.
- For the “Untitled Draft”, select the Review & Deploy button.
- Enter a comment (optional).
- Select the Deploy button.
- Observe how the deployment runs - the spinner and state will display that something is in progress.


This whole procedure is possible because at the creation of the Environments, you specified to clone them from the “Development” Environment. That also cloned this Environment’s current Deployment as a “Untitled Draft” delta, which just had to be deployed.
Remember to perform the Deployment for both the “staging” and “prod” Environments if you haven’t already done so. You do not have to wait for a deployment to finish before launching the next one.
You can now navigate into the Deployments to find the URLs that show your freshly deployed Applications in the new Environments (we showed you how in the “Get to production” step).
Recap
Congratulations! You’ve successfully completed the tutorial on how to scaffold a new Workload and create staging and production Environments. You created a new project/product, starting out from the Backstage developer portal to scaffold your project and trigger the first deployment. You then completed a life cycle iteration from development via staging to production. Your users can now enjoy the live Application!
During this entire exercise, everything was fully self-service. There was no need for you to create a single ticket or interact with other people, which would have induced wait times and disrupted your flow. That’s the power of an Internal Developer Platform, driven by Humanitec’s Platform Orchestrator at its core.
Next Steps
Now that you’re familiar with scaffolding a new Workload and creating staging and production Environments, learn how to provision additional Resources in the Provision an S3 bucket tutorial.
Head to our Dynamic Configuration Management page to discover how to free developers from the burden of defining or maintaining Environment-specific configs for their Workloads.
And check out our Environments page to see how different types work in the Platform Orchestrator.